Purpose: Using Eloqua Program Canvas to activate the Leadspace flag of 'moved'.
The flow below shows how Leadspace users could leverage program/campaign canvas and Leadspace data to automate rules and workflows to automatically create a new contact for an existing contact that has been identified as moved. Please note, this walk-through pertains to data modeling which holds Leadspace data on the contact object.
Creating Update Rules
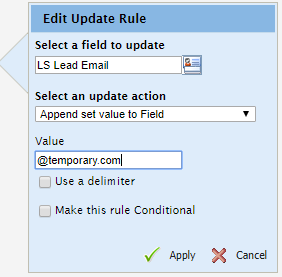
We begin by creating update rules to append a new email address to LS Lead Email. This will allow us to create a new contact in our flow.
Navigate to Audience>Tools>Data Tools
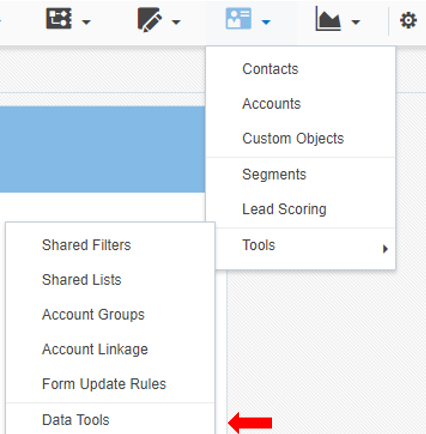
Select "New Update Rule"
![]()
Look up LS Lead Email and select the action as overwrite value from other field. Select the Eloqua Contact ID field.
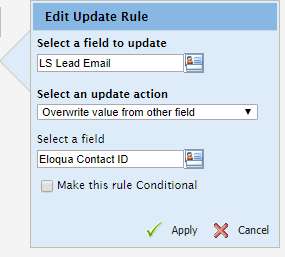
Click Apply.
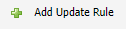
Create another update rule.
Add the following criteria.
We'll now create another update rule set.
Select "New Update Rule"
![]()
Name this update rule "Update Lead Status to DQ". Set the criteria to update your Lead Status or Stage field which is integrated with your CRM (in this case Lead Status). Criteria will be as follows: "Lead Status" "Set to Value" "Disqualified" or a value that is used to designate a contact as moved.
*Please Note: If this field is being passed over to Salesforce and is a picklist field type, please make sure to have the value be an exact match as to not cause any sync issues.
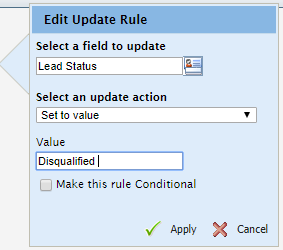
Apply and save.
Form Creation
We'll be utilizing a cloud form submit in our campaign canvas to automate the creation of new contacts. As this is the case, we'll first need to create a couple of forms.
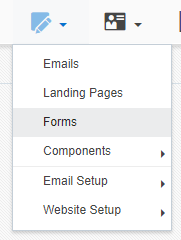
Navigate to Assets>forms>Create a form
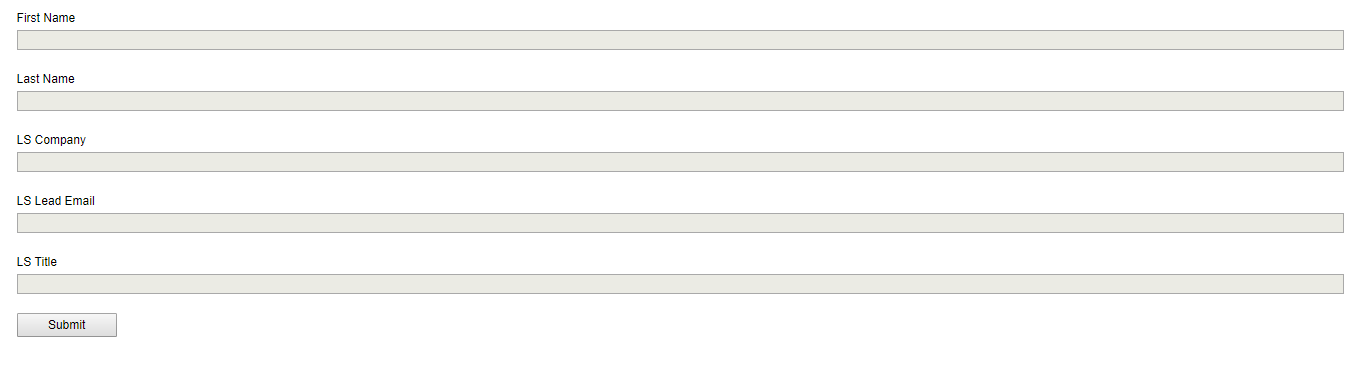
In your form, create the following fields: First Name, Last Name, LS Company, LS Lead Email, LS Title.
Navigate to form processing.
In form processing, create an "Update Contacts - With Form Data" processing step.
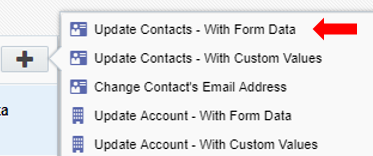
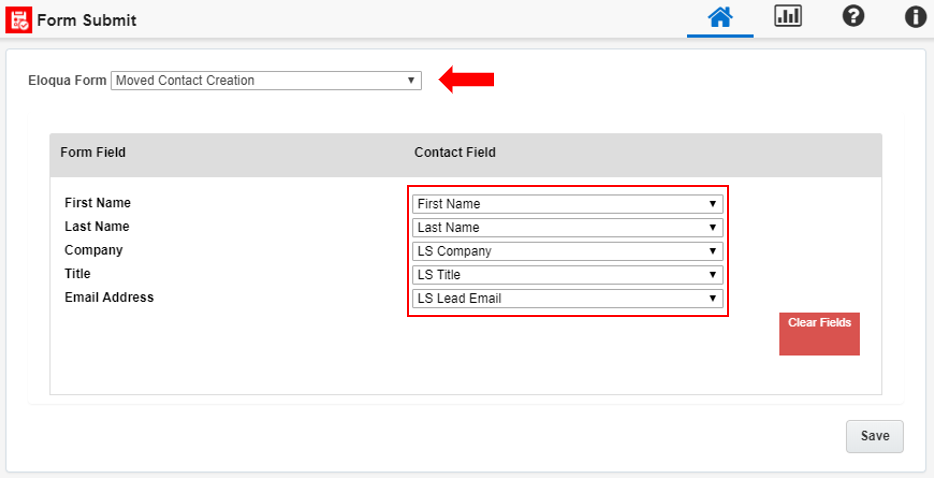
Map the fields as shown below as well as any other fields that are required when creating a new contact:

Save Form.
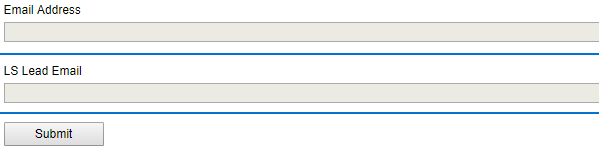
We'll now create one more form which we'll use in our flow. Name this form "Change Contact Email Address".
Insert an Email Address and LS Lead Email field.
Navigate to form processing.
Insert a Change Contact's Email Address.
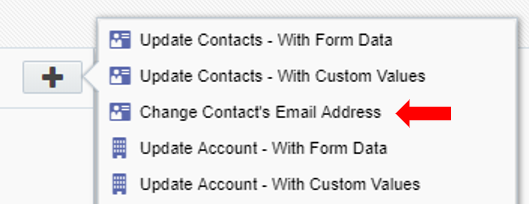
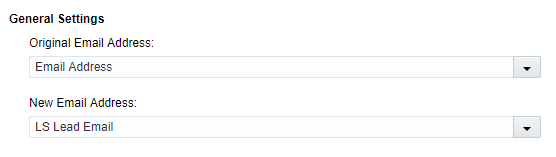
Update the email address with the LS Lead Email.
Save form.
Workflow Creation
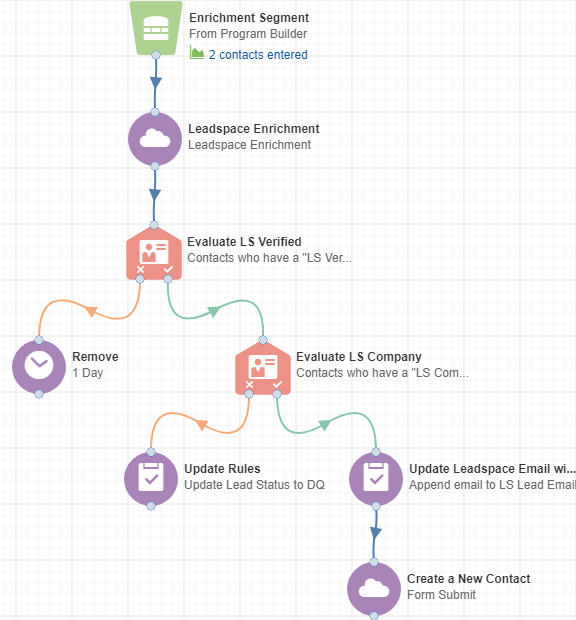
Navigate to the enrichment campaign/program for which you'd like to append the moved contact logic. We'll be using a standard Leadspace Enrichment campaign for this example.
Insert two Compare Contact fields.

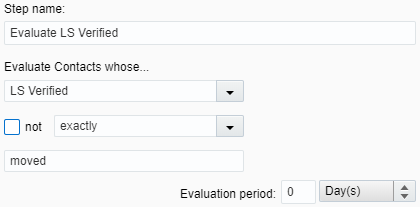
For our first criteria we'll insert a condition which evaluates the LS Verified field to see if the contact has moved. Set evaluation criteria as follows: "LS Verified" is "exactly" "moved"
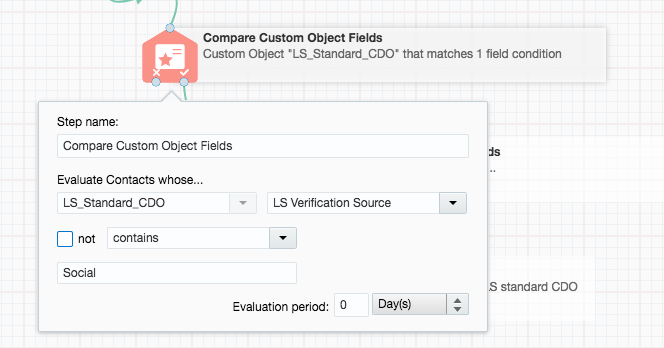
Create another condition where 'LS Verification Source' contains' Social
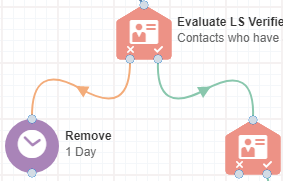
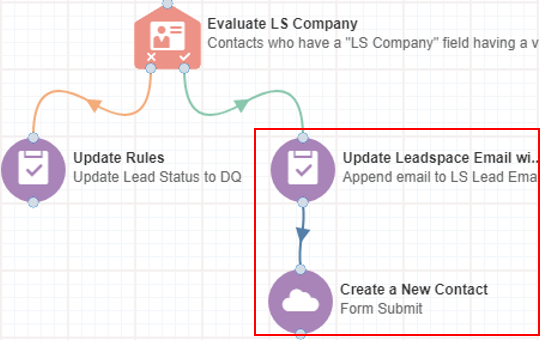
Connect the positive node from this compare evaluation to the next compare contact node we dragged into our canvas, and set the negative path to a wait step of 1 day (we'll let these contacts exit the flow after a day).
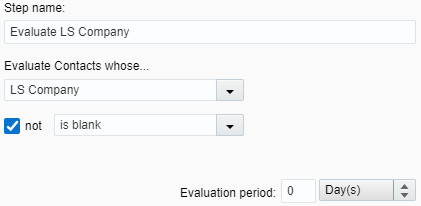
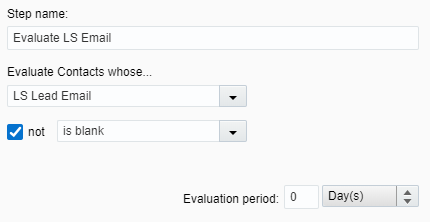
In our next evaluation step insert the following criteria: "LS Company" "not" "is blank".
Insert an update rule to the canvas, and connect the negative node path to the update rule 'Update Lead Status to DQ'. This will allow you to automate the disqualification of contacts based on your update rule automation and CRM integration.
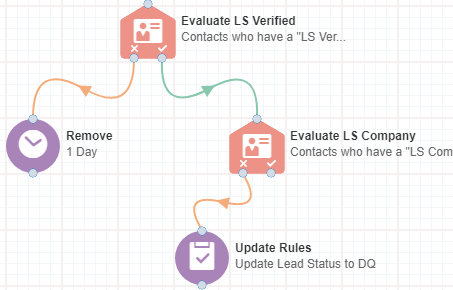
Connect the positive path on the Evaluate LS Company step to an update rule with a selection of your 'Append email to LS Lead Email' update rule, you created earlier.
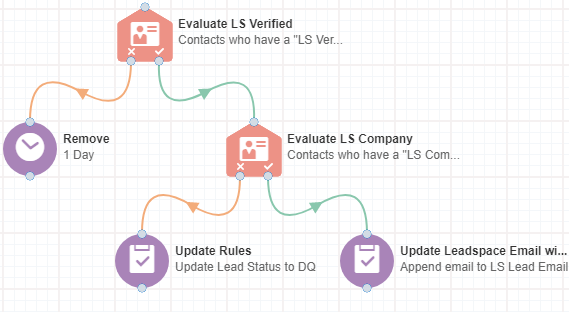
We'll now bring in a Cloud Form Submit step and connect the 'Append email to LS Lead Email' update rule to the Cloud Action.
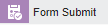
Please note: Certain Eloqua users may not have this natively installed in their environment. This Cloud Action can be installed via the Platform Extensions section of Eloqua by searching for "Form Submit Action".
Configure the Cloud Action.
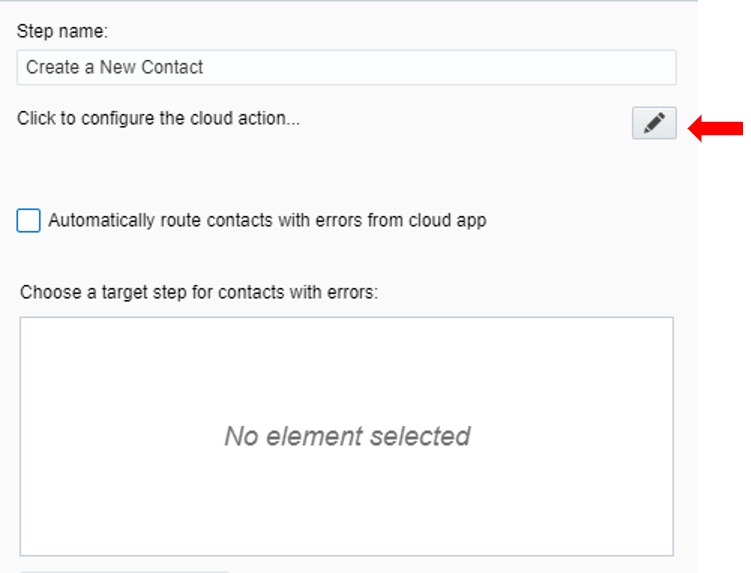
We'll leave the form submit cloud action unconnected to any other actions so contacts can exit the campaign immediately.
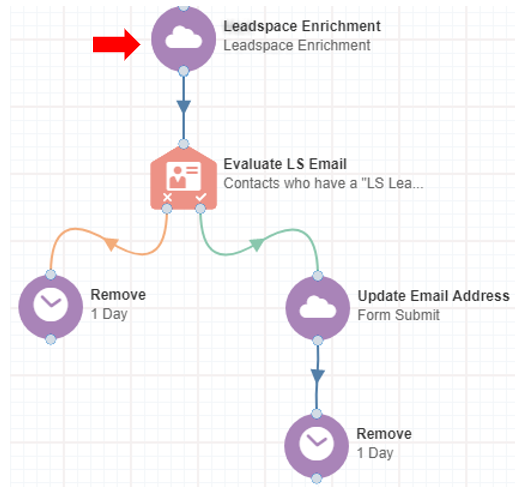
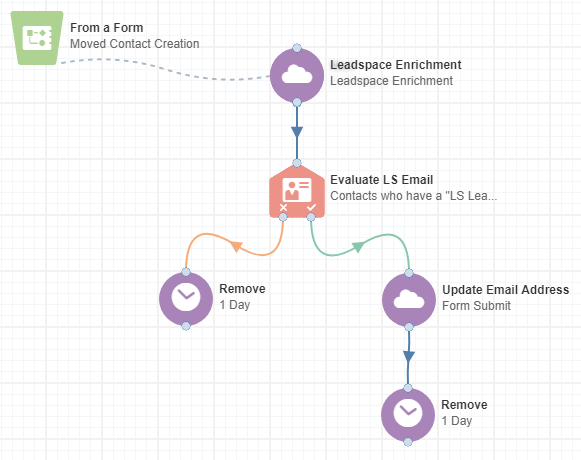
We'll now create a new campaign for the newly created leads to be enrich after they post to our form.
Navigate to Orchestration>Campaigns>Create new
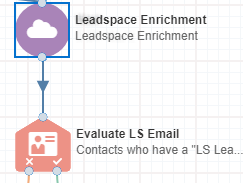
Insert a Leadspace Enrichment Cloud Action and connect it to a compare contact evaluation step.
Set the criteria as follows.
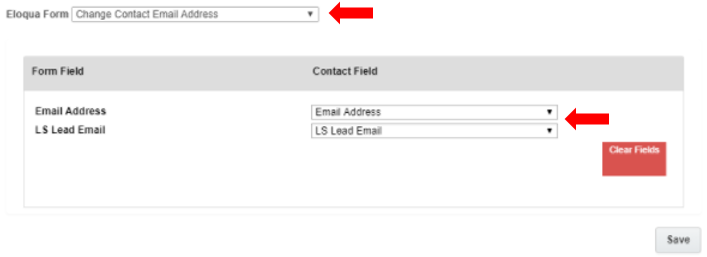
Connect that positive node path to a cloud form submit action, and configure with the following settings.
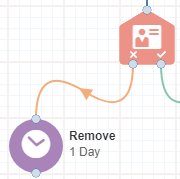
Connect the negative path to a one day wait step which we'll remove after 24 hours.
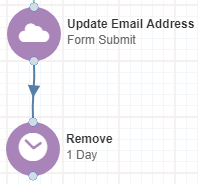
Connect the Update Email address Form Submit Cloud Action to a one day wait step.
Save campaign.
We'll now make one adjustment to our form prior to activating our campaign. Return to the form "Moved Contact Creation", and navigate to the processing steps.
We'll now add this contact to the new enrichment step we created in our campaign.
Save form.
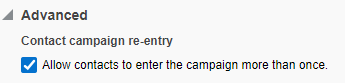
Return to Campaign and ensure in advanced selections "Allow contacts to enter the campaign more than once" is selected.
Once complete, your flows should resemble the following.
Original Enrichment Campaign
New Contact Enrichment Campaign
You can now save and activate your campaigns.